If the administrator account is linked with Microsoft account then you can change an administrator name by going to settings then click on Accounts then select your Info, and then click on the Manage my Microsoft Account option. After that Microsoft website will open on your screen and you able to change your profile and restart your system when you have done to apply the changes that you have made to the Administrator Name.
How to Change Administrator Name on Windows 10?
Follow the below steps if you want to change the Administrator name on windows 10. these steps and screenshots will really help you to change the administrator name on windows 10.
Step 1:
Open the Start menu. You will find the start menu at the lower left bottom of your desktop screen.
Step 2:
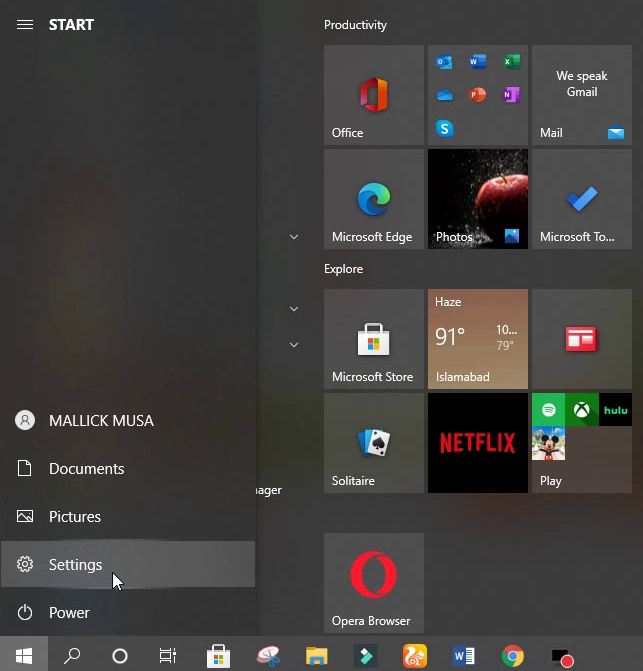
Now select setting you can see the setting icon above on power icon, screenshot is also attached for reference.
Step 3:
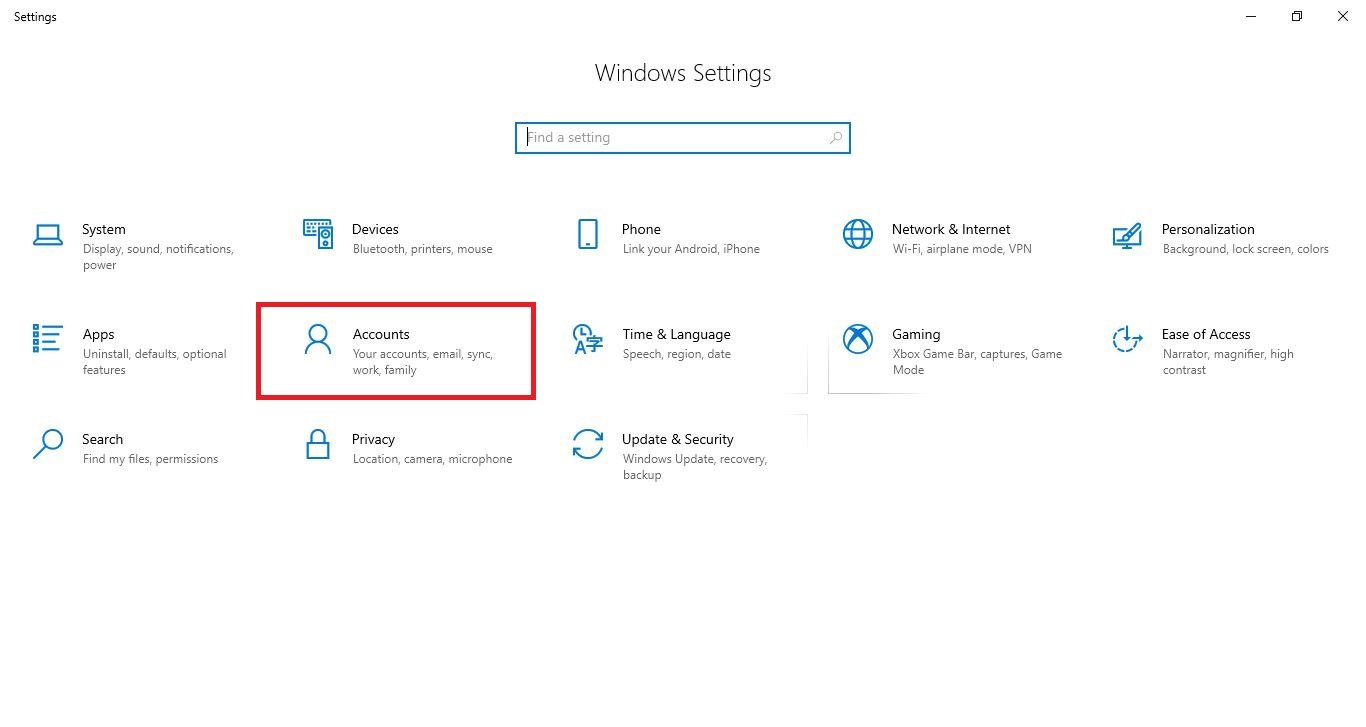
Now click on accounts. In accounts click on Your Info, you will find this option on the left sidebar in accounts.
Step 4:
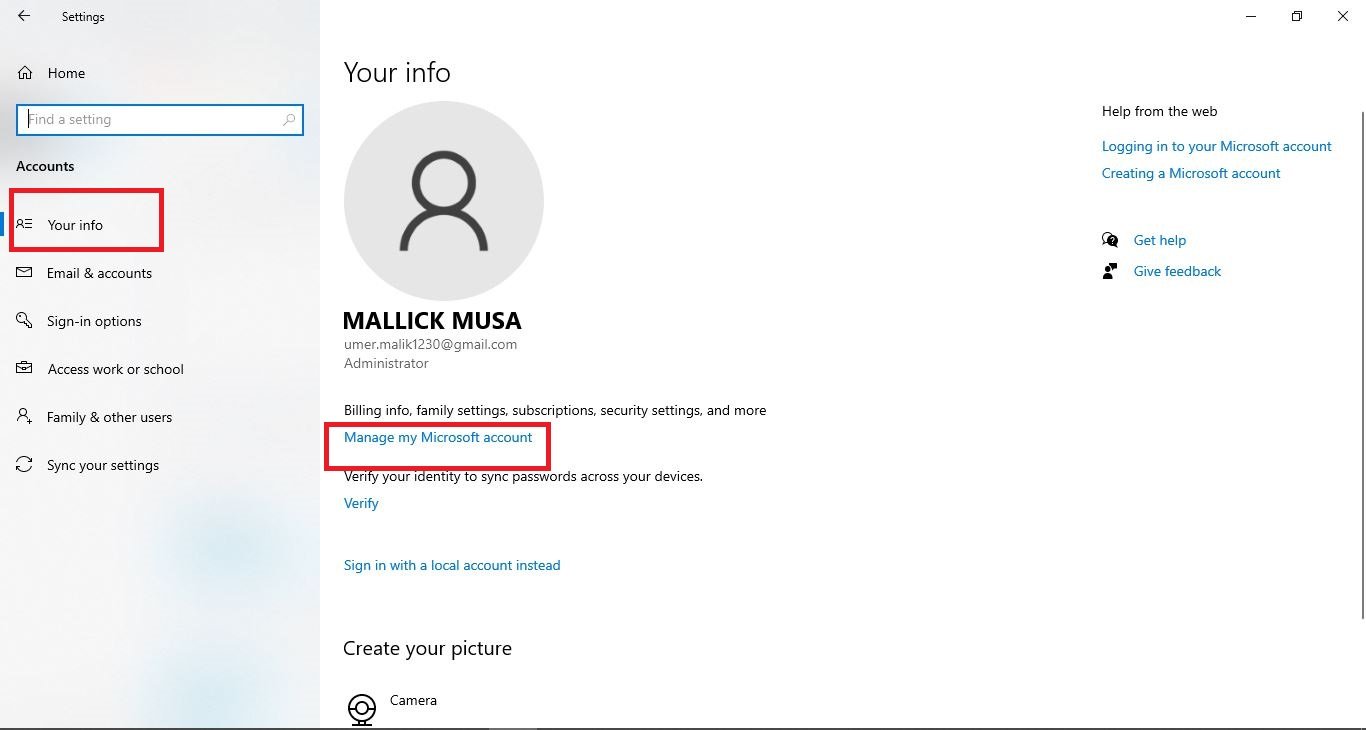
Then click on Manage my Microsoft account. After clicking it will take you to the Microsoft account page.
Step 5:
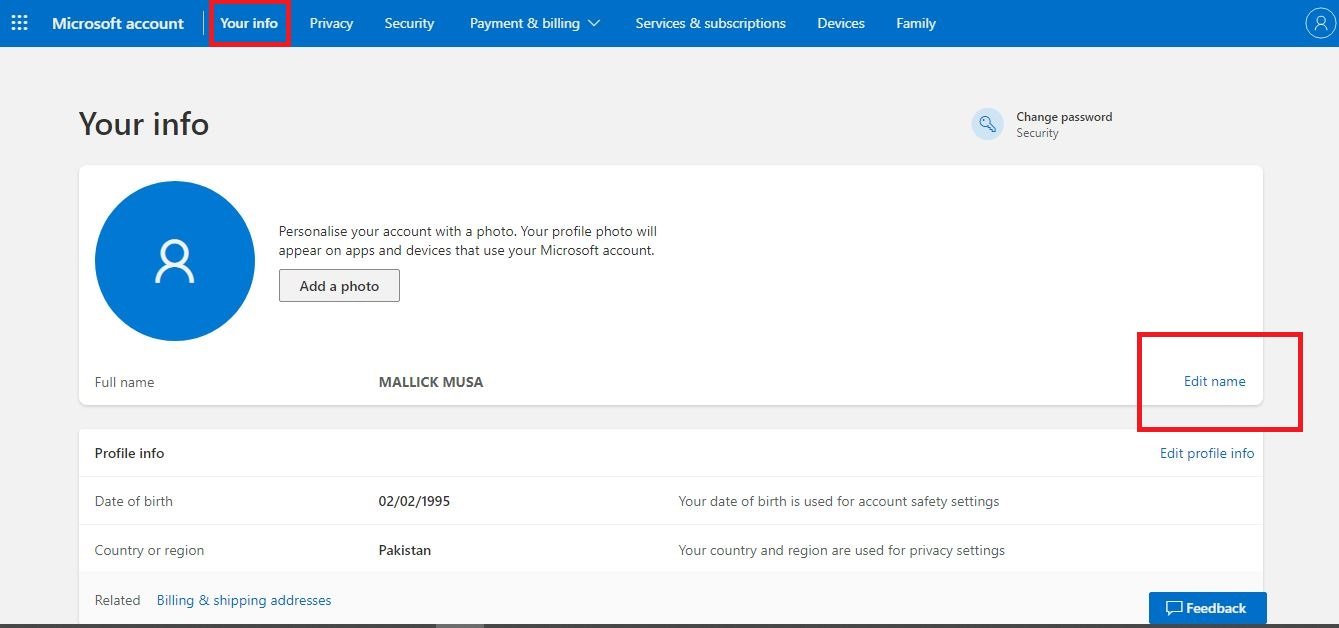
Then click on Your Info. This will open your profile info. Now click on Edit Name. You will find this option on the right side of your screen.
Step 6:
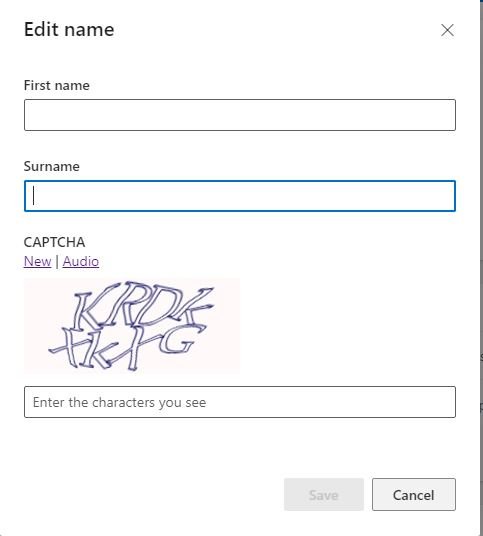
Now Enter the First Name and Last Name which you want. Then enter Captcha code and click save to save the changes you have made.
Step 7:
Then restart your Pc from the power icon in the start menu. After restarting your computer the changed name will be applied.
So if you want to change the Administrator name on Windows 10 then follow the above steps. This article will help you to change the Administrator name on Windows 10. Screenshots are also available with steps. Screenshots will make it easier for you to follow each step. For more solutions of your problems, you can visit our website (wuschools.com). Our team wants to make things easier for you and provide the best solution which can help you to solve your problems.


