There are many reasons to change your computer name. Especially if you bought your computer directly from the manufacturer. Then its name is something like “windows-user-pc” or “DESKTOP-TBMSQ44”. If you want to connect your computer through a homegroup to share files and printers. Homegroup makes sharing easy and it is easy to recognize that which computers are connected in your network. Changing your computer name is helpful and more descriptive.
Maybe you want to name your computer something cool and attractive and add some personal touch. Before windows 10, changing your computer name is complicated. Windows 10 makes it easy and for the user by giving a new settings menu.
How To Change Computer Name in Windows 10
In this article, you will know how to change the computer name in windows 10. Here you will get an easy way with screenshots to change the name of the computer.
Step: 1

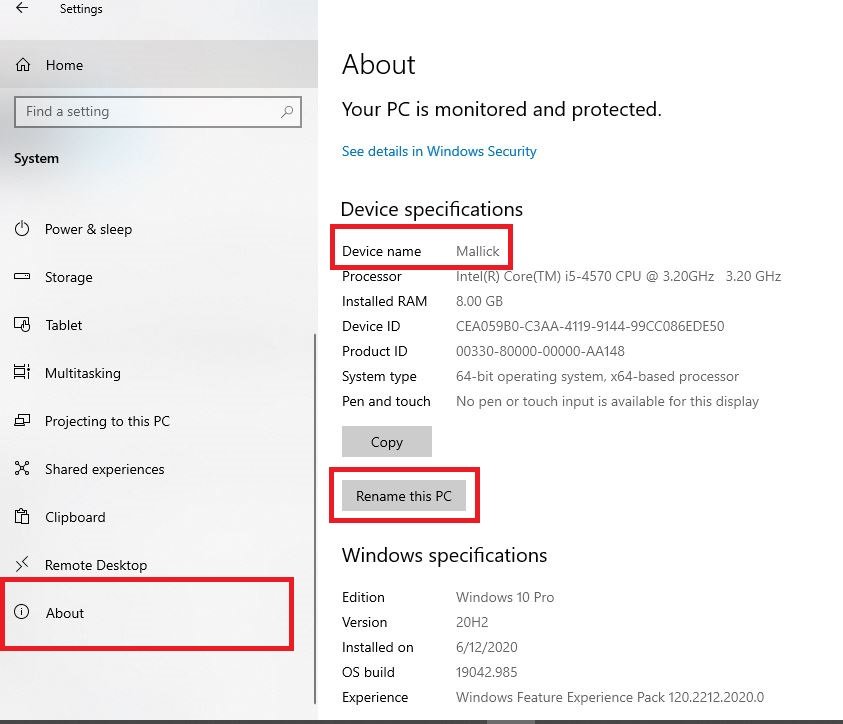
Open Settings and go to System then scroll down and click on about. In about you can see your computer name next to Device Name or Pc Name.
Step: 2

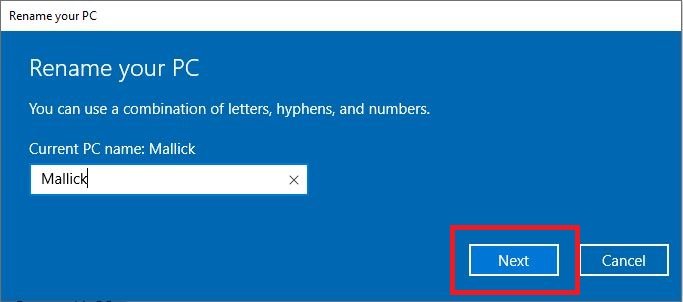
Rename your computer by clicking on Rename This Pc. Now type new name for your Pc and then click next.
Step: 3

Then a new window will open and ask you to restart your pc now and later. If you want to change your computer name immediately then click on Restart Now to restart your computer and apply the changes. If you click on Restart Later then your computer name will be changed when you restart your computer next time.
So if you want to change the name of your computer then follow the above steps. I am sure this article helps you in changing your computer name. You can visit our website (wuschools.com) for more solutions of your problems. Wuschools.com team wants to make things easy for you and provide you best solution of your problems.


![Read more about the article [Tips 2023] How To Overclock Monitor?](https://wuschools.com/wp-content/uploads/2022/07/How-To-Overclock-Monitor-300x169.jpg)