In this article, we are going to teach how to disable SmartScreen in Windows 11. Smart Screen is a program that is used to keep your computer safe and secure. This Smart Screen program ensures the safety of your browser and computer by staving off you from downloading and running probably programs and malicious files.
As Windows Smart Screen is a good idea but still you have to face primary issues with this program like it often generates erroneous positives even for secure applications. So, if you want to disable Smart Screen in Windows 11, but don’t know how to do this? Then it’s the right place for you.
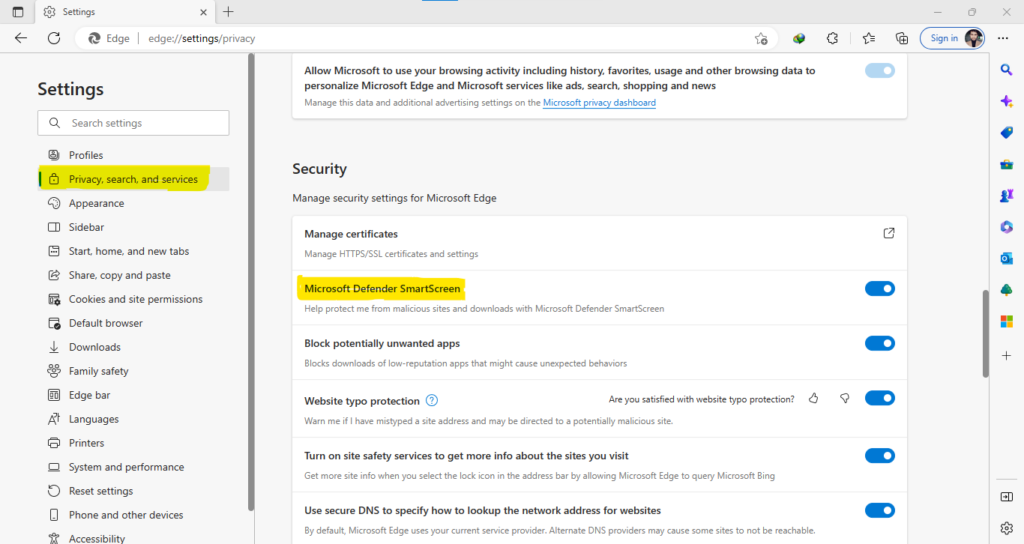
Here is a quick process to disable Smart Screen in Windows 11, you have to choose Settings and more > Settings > Privacy, search, and services. After that under services, you can turn Smart Screen off or on.
To learn about all ways to Disable SmartScreen In Windows 11, we have to dive into details. So, let’s start.
4 Ways to Disable SmartScreen In Windows 11
1. Disable Defender SmartScreen Using Internet Properties
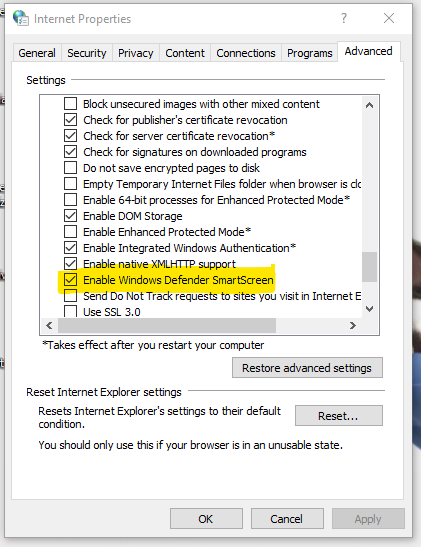
Using the internet properties dialog to disable or turn on Windows Defender SmartScreen is a good way. This way also allows you to configure safety and access settings, add-ons, Active-X controls, and others. So, you have to follow these steps to turn off SmartScreen through Internet Options:
- First of all, you have to Press Win + R to open Run.
- After that, you have to type control and then click OK to open the Control Panel.
- Now, you have to click on Network and Internet.
- Next, you have to click on Internet Options.
- After that, you have to open the Advanced tab in the Internet Properties window.
- Here, you have to Scroll down to the section of Security.
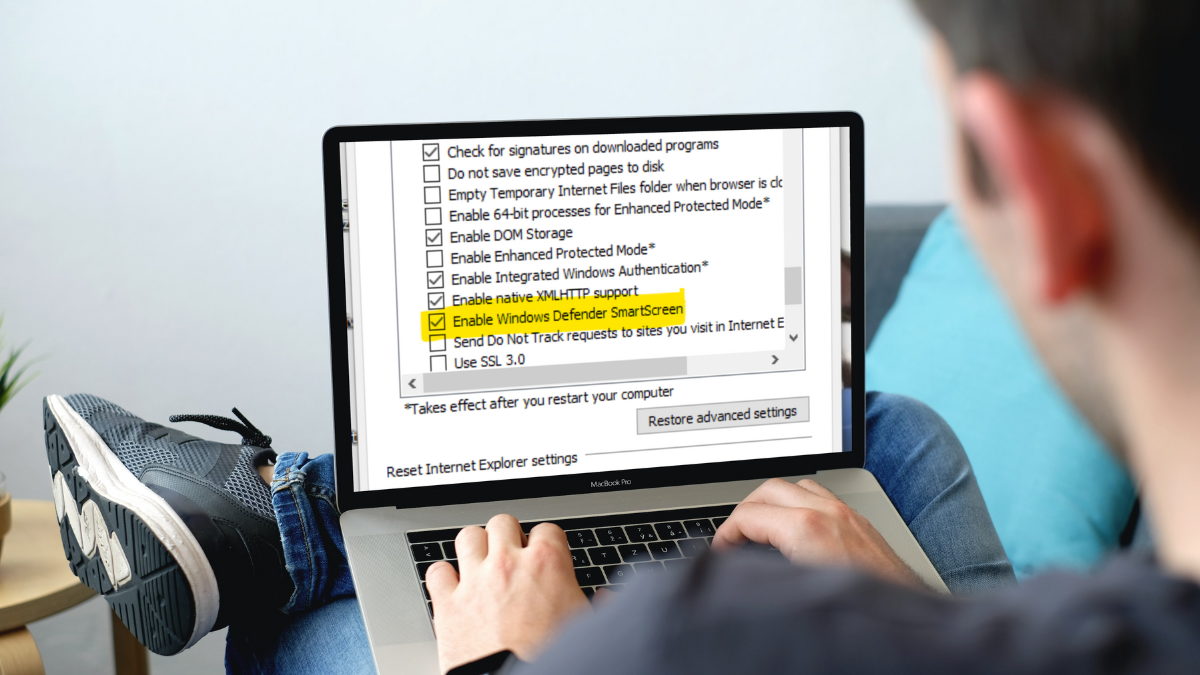
- Now, you have to Uncheck the option of Enable Windows Defender SmartScreen.
- After that, you will Click Apply and OK in order to save changes.

2. Disable SmartScreen Using Microsoft Edge
To disable Defender SmartScreen, Microsoft Edge has a built-in. Following are the steps to access it.
- Firstly, you have to Launch Microsoft Edge and then have to click the menu of three dots that you can find in the top right corner.
- After that, you have to Click on Settings.
- Now, you have to Open the Privacy, search, and services tab that are placed in the left pane.
- Here, you have to scroll down the section of Security. Now, you have to toggle the switch for Microsoft Defender SmartScreen to turn it off or disable it. Doing this will also disable the option of blocking potentially unwanted applications.
- However, if you select to allow SmartScreen again, you’ll have to allow the Block potentially unwanted applications feature manually.

3. Disable SmartScreen through Windows’ Security Settings
One of the easiest ways to disables the SmartScreen is by using the Windows Settings panel. Following are the steps to disable SmartScreen in windows 11:
- First of all, you have to open Settings.
- After that, from the left pane, you have to Open the Privacy and Security tab.
- Now, you have to Click on Windows Security.
- After that, you have to, click on Open Windows Security.
- Here, you have to Open the App & browser control tab in the left pane.
- After doing that, you will Click on Reputation-based protection settings under Reputation-based protection.
- Now, you’ll see here four various filters of SmartScreen you can separately disable or enable. If you need to disable the filter just for files and executables, then you retain turn off the option of Check apps and files and also Potentially unwanted app-blocking filters. The two other filters are for Microsoft Store apps and Microsoft Edge.
- You have to disable all four filters in order if you need to turn off SmartScreen completely.
4. Disable SmartScreen Using the Group Policy Editor
In order to organize the SmartScreen filter for numerous computers at your organization, then you need to use the Group Policy Editor to accomplish this task. So, follow the steps for this process:
- Firstly, you have to Press Win + R to open Run.
- Now, you have to Type gpedit.msc and then click OK to open the Group Policy Editor.
- After that, you have to navigate to the location from Group Policy Editor:
- Now, you have to right-click on Configure Windows Defender SmartScreen policy in the right pane and then choose Edit.
- Here, in order to disable SmartScreen, you have to choose Disabled.
- But if you need to enable SmartScreen, then you have to select Not Configured or Enabled option.
- Now, you have to Click Apply and OK to save changes.
- After that, you have to close Group Policy Editor and then you will restart your PC.
Conclusion
To Conclude, the Windows Defender SmartScreen is very helpful and valuable, but when it begins to shut off trustworthy applications, it causes you to think if it’s worth keeping enabled. So, you just have to follow the above-mentioned instructions. Hopefully, they help you a lot!


